Running a successful online store requires not just a visually appealing design but also robust functionality to meet the diverse needs of your customers. Optimizing your WooCommerce store for maximum customer engagement and satisfaction is paramount. One powerful tool that can elevate your e-commerce game is BeePlugin’s WooCommerce Retail Discount Plugin.
In this Step-by-Step guide, we’ll walk you through the process of installing the plugin on your store.
But, first we will explore what WooCommerce discount plugins are, and what are the various types of discount plugins.
Why do you need a WooCommerce Discount Plugin?
- Boost Sales and Conversion Rates:
Offering discounts is a proven strategy to entice customers and drive sales. A Discount Plugin provides you with the flexibility to experiment with various discount structures, finding the sweet spot that resonates with your audience. - Attract and Retain Customers:
Discounts are a powerful magnet for attracting new customers and retaining existing ones. A well-crafted discount strategy can differentiate your store from competitors and foster customer loyalty. - Clearance and Inventory Management:
Use Discount Plugins to efficiently manage inventory by creating clearance sales or time-sensitive promotions. This not only helps clear out old stock but also generates excitement among customers. - Create Marketing Buzz:
Launching strategic discount campaigns can create a buzz around your brand. Whether it’s a seasonal sale, holiday promotion, or exclusive discounts for loyal customers, Discount Plugins allow you to orchestrate compelling marketing initiatives. - Flexible Promotion Structures:
Discount Plugins offer a range of flexibility in setting up promotions. Whether it’s percentage-based discounts, fixed amount discounts, buy-one-get-one (BOGO) offers, or tiered pricing, you have the tools to tailor promotions to your business goals.
Exploring the Types of Discounts You Can Set Up Using Retail Discount Plugin
- Percentage-Based Discounts:
Set a percentage discount on products or catalog categories, appealing to price-sensitive customers and incentivizing larger purchases. - Fixed Amount Discounts:
Offer a fixed amount discount, providing customers with a straightforward reduction on the purchase price. - Seasonal and Holiday Promotions:
Capitalize on seasonal events and holidays by creating themed promotions and discounts that align with the festive spirit.
Before diving deep into the installation process, we will explore the plugin requirements and its compatibility to ensure you have a smooth installation experience.
Steps to Consider Before Installing WooCommerce Plugins
- Ensure You Have the Necessary System Requirements:
- WordPress Version: 5.0.1 or later.
- WooCommerce Version: 4.2.2 or later.
- PHP Version: 7.2.34 or later
- You must purchase the pro version; then login to your account and download the installation file.
- Clear the website cache
- Backup your website before plugin installation.
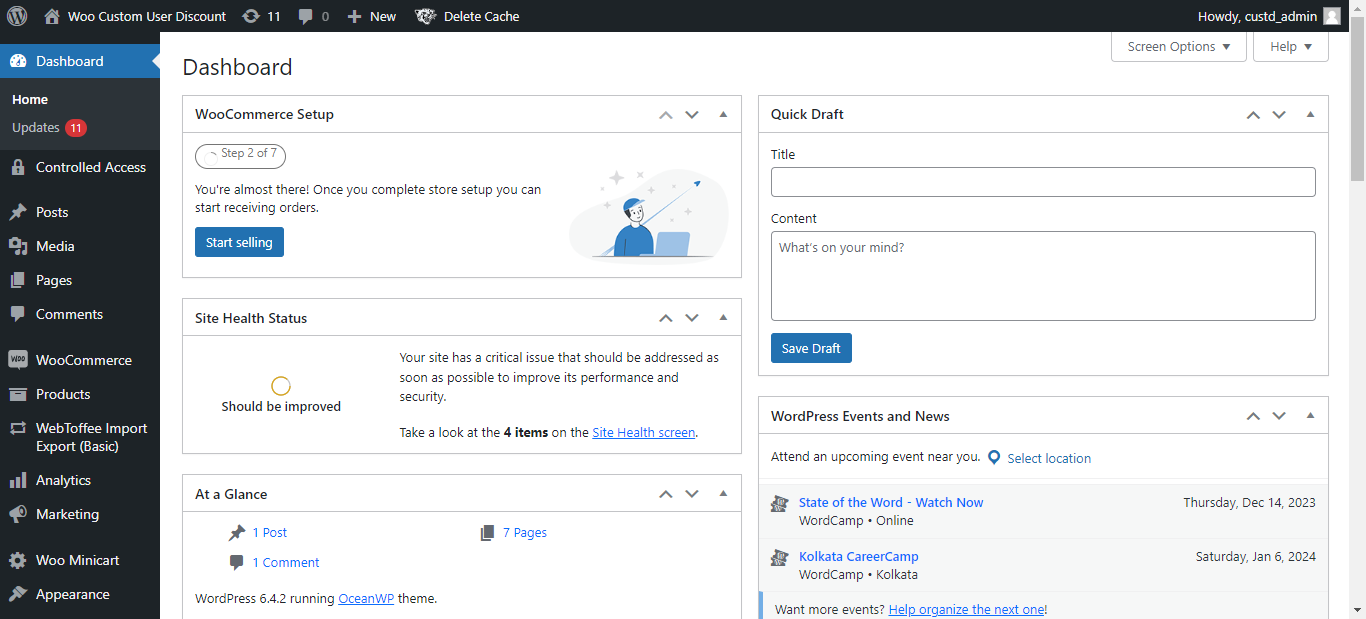
Step 1: Access Your WordPress Admin Dashboard
- Start by logging into your WordPress admin dashboard. You can do this by navigating to yourdomain.com/wp-admin.
- Once logged in, you’ll see the familiar WordPress dashboard.
Step 2: Navigate to the Plugins Section
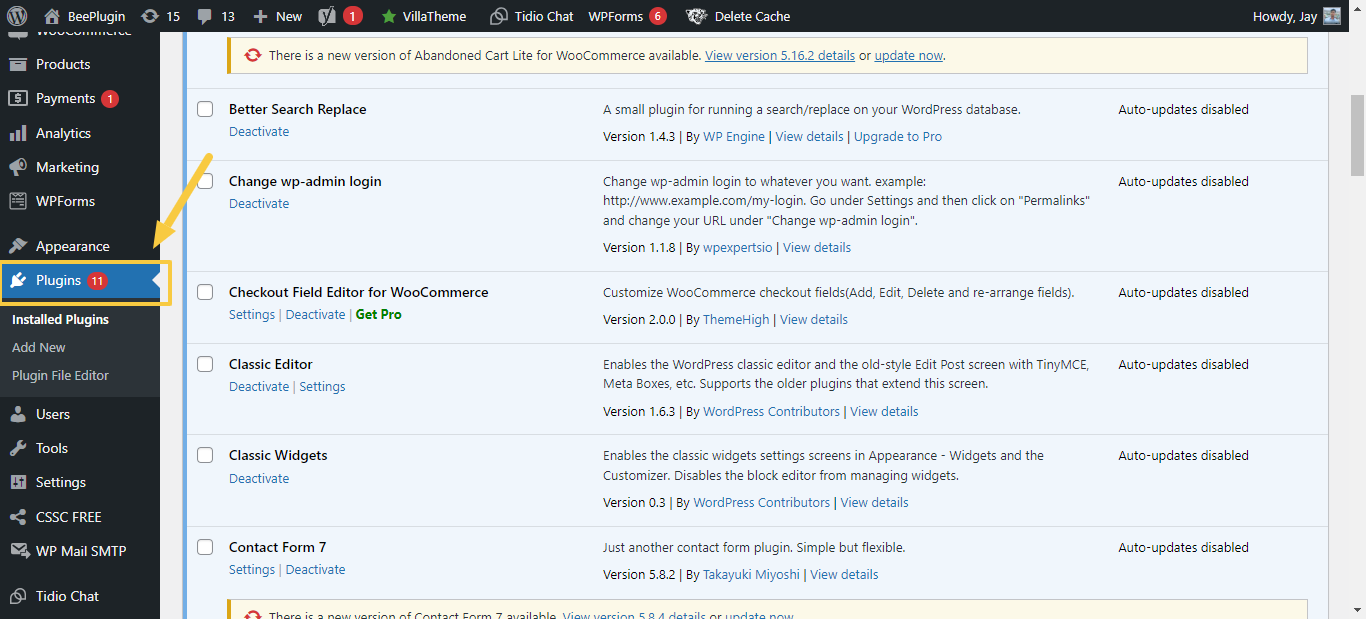
On the left-hand menu, locate and click on the “Plugins” tab. This will open the Plugins page, where you can manage all your installed plugins.
Step 3: Click on “Add New”
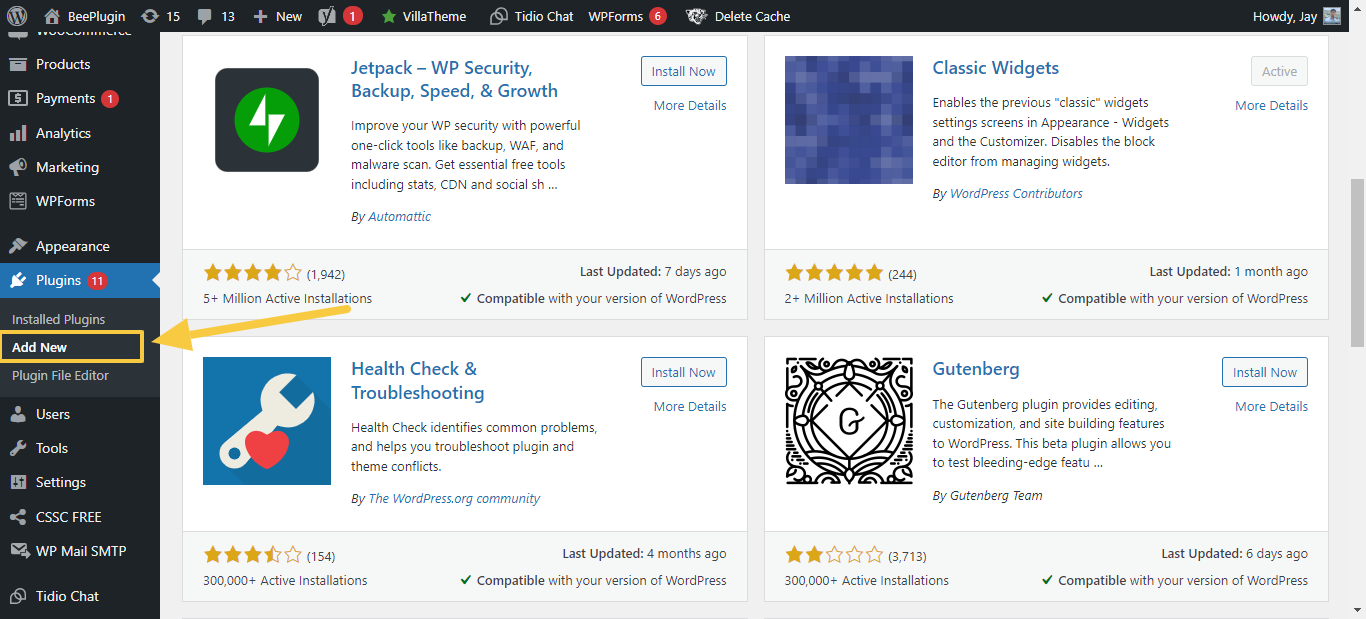
At the top of the Plugins page, you’ll find the “Add New” button. Click on it to access the plugin installation interface.
Step 4: Download and Install the Plugin
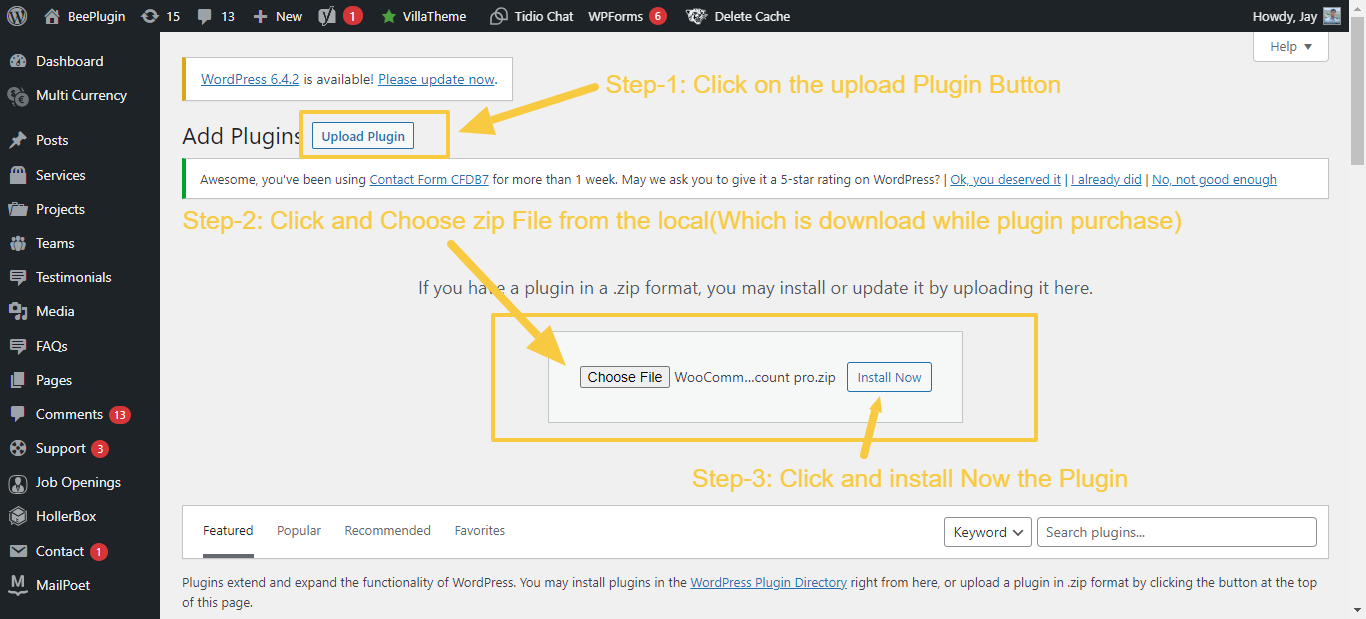
- First Download the WooCommerce Retail Discount Plugin from our store.
- On the Plugins page, Select the “Add New” button at the top. Click on it to access the plugin installation screen.
- In the “Add Plugins” screen, Select an “Upload Plugin” button. Click to open the plugin upload form.
- Click the “Choose File” button and select the plugin file you downloaded earlier. After selecting the file, click the “Install Now” button.
Step 5: Activate the Plugin
- After the installation is complete, a new button labeled “Activate” will appear.
- Click on this button to activate the Plugin.
- Activating the plugin is crucial for it to start functioning on your WooCommerce store.

6 Step: Configure Plugin Settings
- Some plugins may require additional configuration.
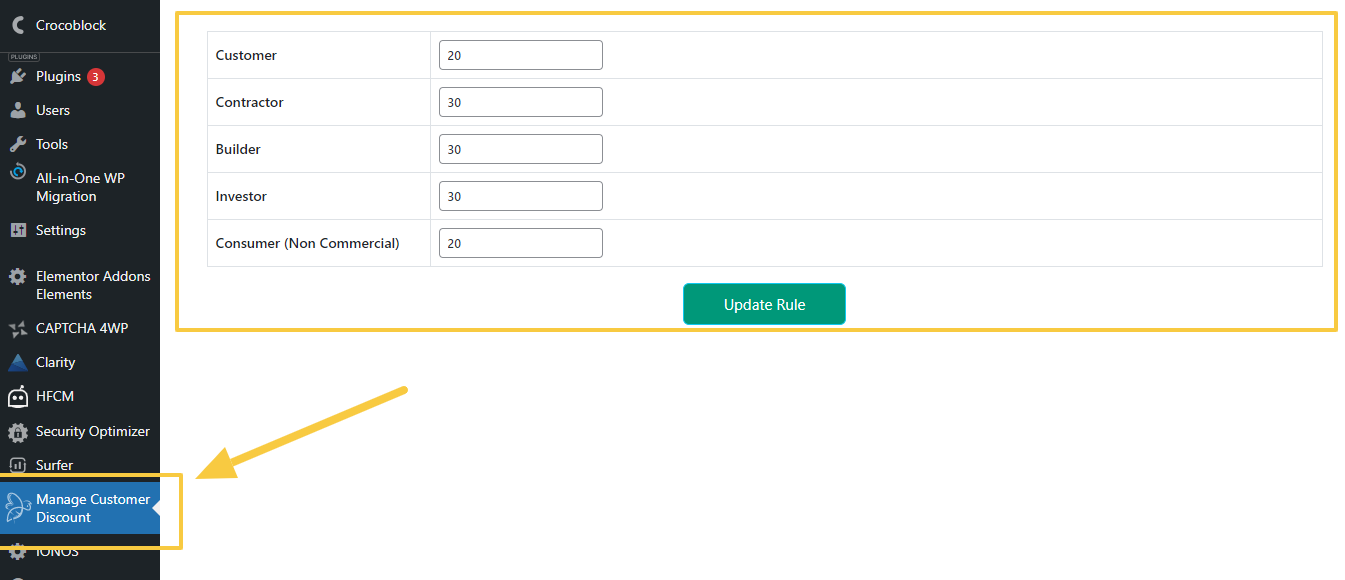
- Look for a new menu item on the left side of your dashboard related to the installed plugin.
- Click on it to access the settings and configure the plugin according to your preferences.
7 Step: Regularly Update Your Plugins
- Keeping your plugins up-to-date is essential for the security and performance of your WooCommerce store.
- Check for updates in the Plugins section, and if there are any available, click on the “Update Now” button.
- Installing a new plugin on your WooCommerce store is a straightforward process that can significantly enhance your store’s functionality.
8 Step: Troubleshooting and Support:
In case of any issues during installation or setup, utilize available resources:
- Troubleshooting: Address common installation or setup issues by referring to the WooCommerce Retail Discount Plugin documentation or FAQ section.
- Support Channels: Reach out to BeePlugin’s support team for assistance if you encounter any challenges or require additional guidance.
Don’t miss out on our offer! Use code “XMAS10” to avail exciting discounts
Conclusion:
Whether you’re looking to improve the checkout process, integrate with third-party services, or add new features, WooCommerce’s extensive plugin library has you covered.
By following this step-by-step guide, you’ll be able to seamlessly integrate new plugins and take your online store to the next level.
Remember to choose plugins from reputable developers and regularly update them to ensure a smooth and secure e-commerce experience for your customers.


 Article
 Infographic
 Plugin Development
 WordPress Development
 WooCommerce Development


Jay