Inventory management in WooCommerce is essential to boost sales, meet customer demands, prevent stockouts, and minimize excess inventory. WooCommerce, one of the most popular eCommerce platforms, offers robust features to manage inventory which enable store owners to efficiently track and control their stock.
This guide provides an in-depth look at how to optimize inventory management in WooCommerce, covering everything from initial setup and product categorization to advanced strategies for automation and optimization.
Whether you are a small business owner or managing a large online store, understanding how to effectively use inventory management tools will help streamline your operations, enhance customer satisfaction, and drive your business’s growth.
Although WooCommerce provides ample inventory management features, to get advanced functionalities on your online store you need to develop customized plugins. BeePlugin is the leading developer of WooCommerce Plugins which can transform your store in a few clicks.
Here’s a step-by-step guide on how to manage inventory in WooCommerce:
Step-by-Step Guide to Managing Inventory in WooCommerce
-
Enable Stock Management in Settings
Before managing inventory, ensure that stock management is enabled:
- Go to your WordPress dashboard.
- Navigate to WooCommerce > Settings.
- Click on the Products tab and then select the Inventory section.
- Check the box for Enable inventory management in WooCommerce.
- Configure the remaining settings according to your preferences, such as low stock threshold, out of stock visibility, and notifications.
- Click Save changes.
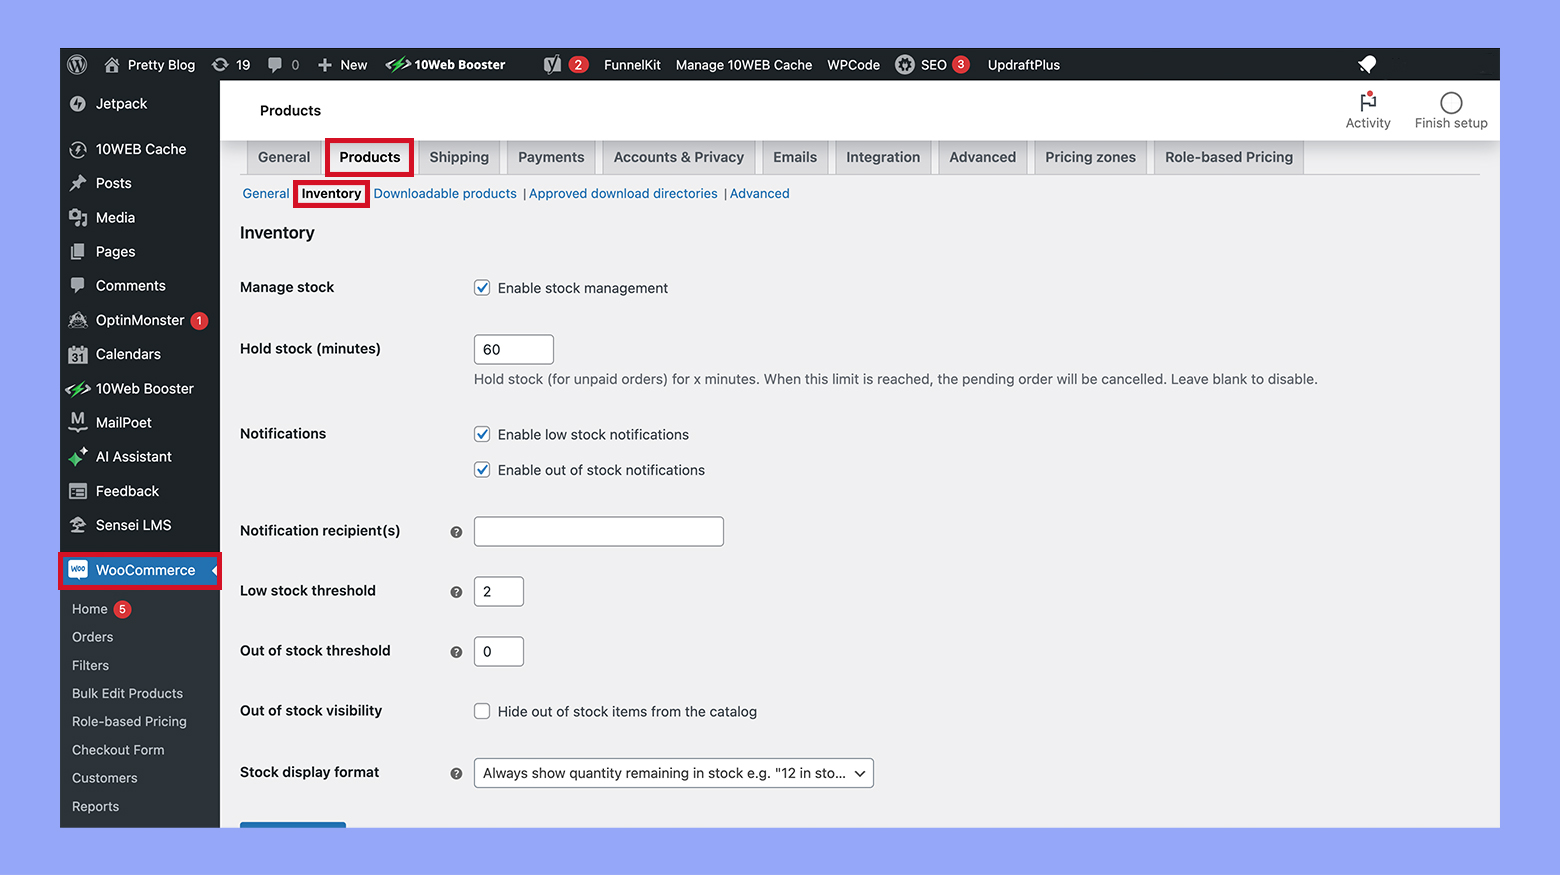
Image credit: https://woocommerce.com/
-
Add or Edit a Product
You can manage inventory for each product individually:
- Go to Products > All Products.
- Select an existing product to edit or add a new product by clicking Add New.
- Scroll down to the Product Data section.
-
Configure Inventory Settings for a Product
Under the Product Data section:
1. Click on the Inventory tab.
2. Check the Manage stock? box to enable stock management for this product.
3. Enter the Stock quantity. This is the number of items you currently have in stock.
4. Set the Stock status:
- In stock: The product is available for purchase.
- Out of stock: The product is not available for purchase.
- On backorder: Customers can still purchase the product, but it will be shipped when it’s back in stock.
5. (Optional) Enable Allow backorders:
- Do not allow: Prevents customers from ordering out-of-stock items.
- Allow, but notify customer: Allows backorders and notifies customers that the product is on backorder.
- Allow: Allows backorders without notifying customers.
6. (Optional) Set the Low stock threshold to receive notifications when stock levels reach a certain point.
7. (Optional) Enter the SKU (Stock Keeping Unit) for better inventory tracking.
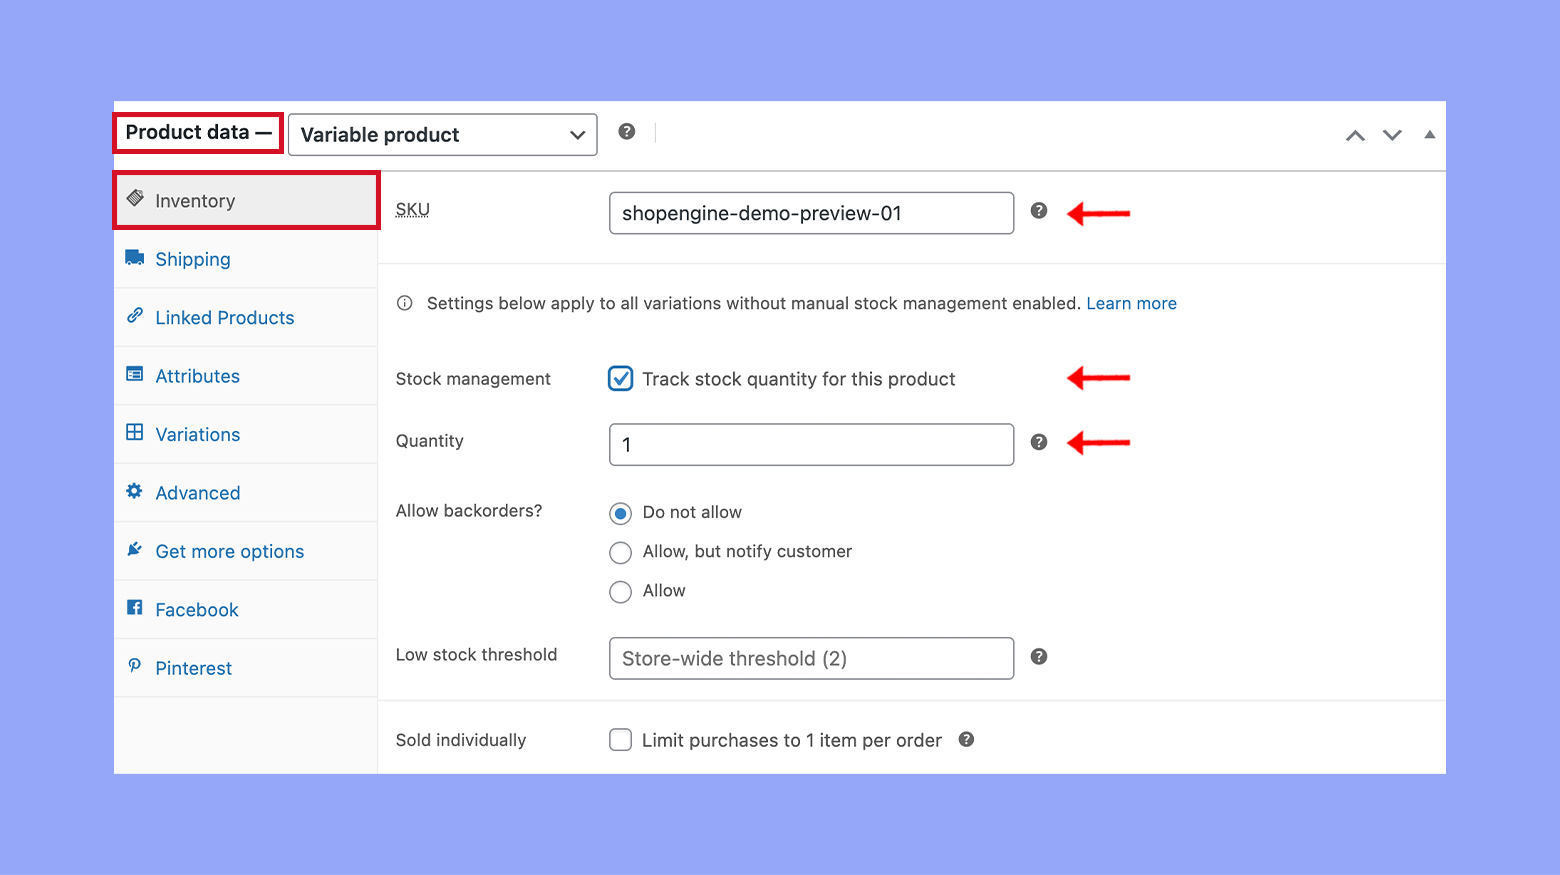
Image credit: https://woocommerce.com/
-
Manage Stock for Variable Products
For variable products (products with variations like size or color):
- Go to the Product Data section and select the Variations tab.
- Expand each variation to set inventory details:
- Check the Manage stock? box for each variation.
- Enter the Stock quantity, Stock status, and Allow backorders settings for each variation individually.
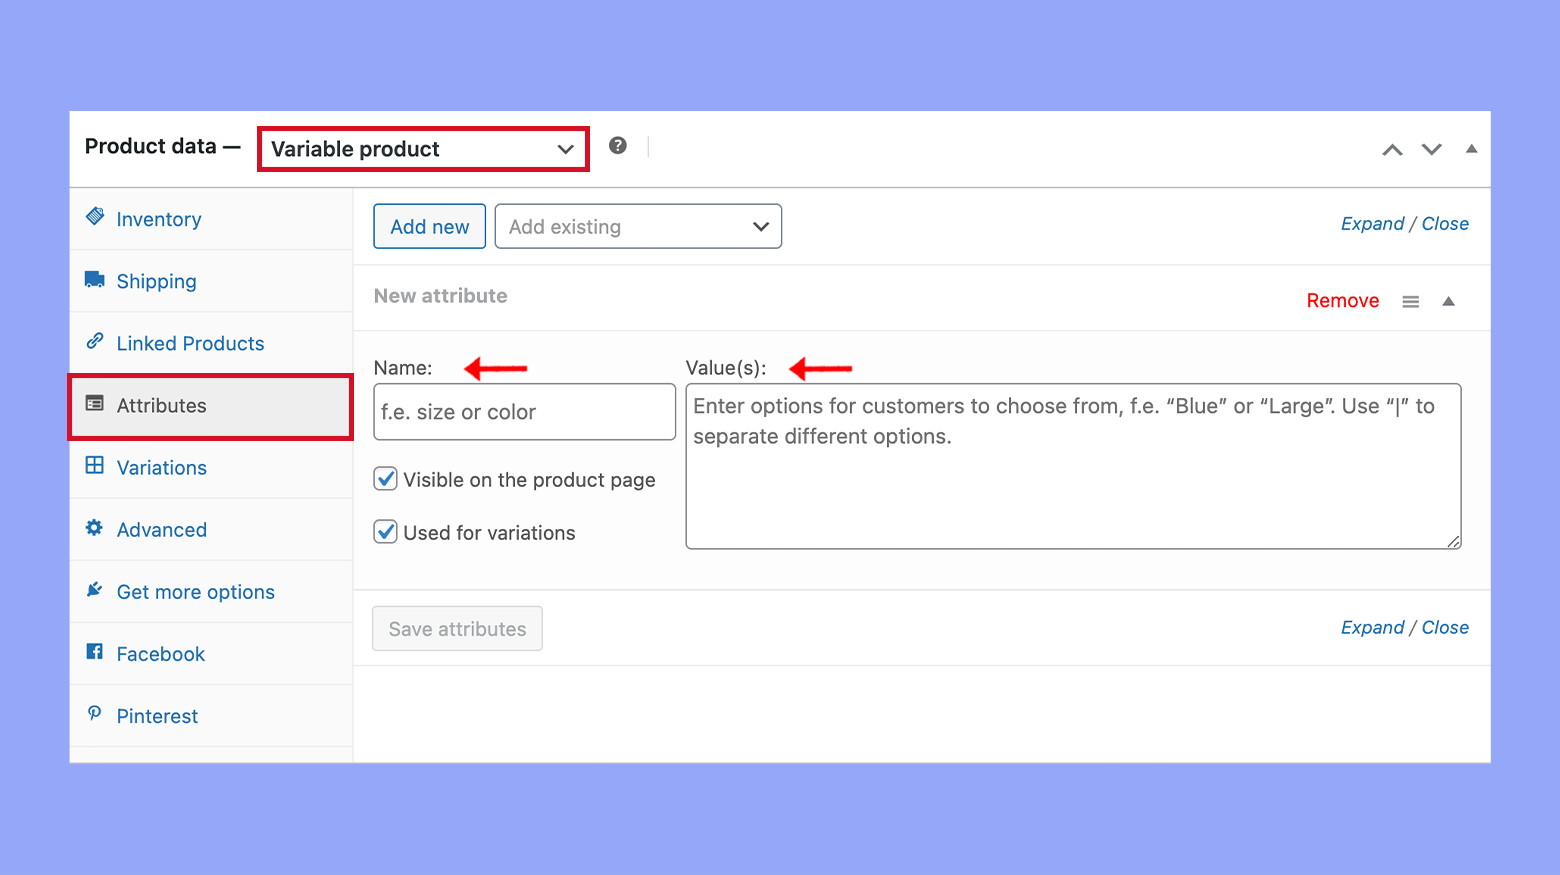
Image credit: https://woocommerce.com/
-
Monitor and Update Inventory
Regularly monitoring and updating your inventory is crucial:
- Go to WooCommerce > Reports.
- Select the Stock section to view stock reports.
- Stock Levels: Shows current stock levels for all products.
- Out of Stock: Lists products that are out of stock.
- Low Stock: Lists products that are low in stock.
6. Update stock levels directly from the product edit page or by using bulk actions.
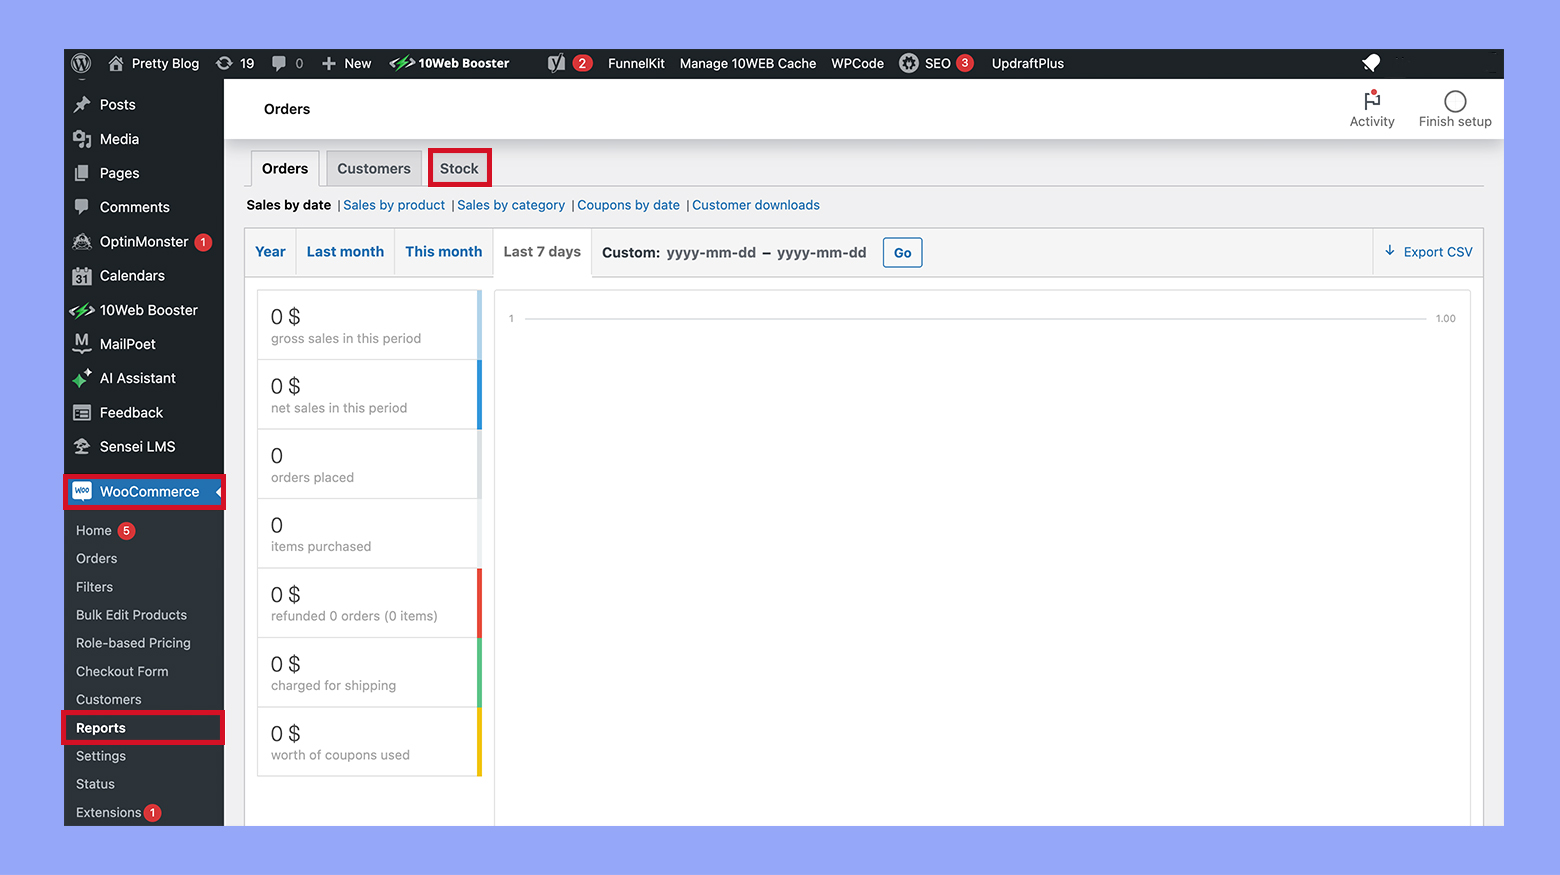
Image credit: https://woocommerce.com/
How to Install BeePlugin WooCommerce Discount Plugins
Installing a WooCommerce discount plugin helps to manage your inventory. It lets you sell more old products and refill inventory with new products.

Step 1: Download the WooCommerce Custom Discount Plugin
First, download the WooCommerce plugin ZIP file. Visit the BeePlugin official website at https://www.beeplugin.com/custom-woocommerce-discount/, purchase the plugin, and download the ZIP file.
Step 2: Access Your WordPress Dashboard
Log in to your WordPress admin dashboard by going to replacing yourdomain.com with your website’s domain name.
Step 3: Navigate to the Plugins Section
In the WordPress dashboard, select “Plugins” from the left-hand sidebar menu to expand the Plugins options.
Step 4: Click on “Add New”
In the Plugins section, click the “Add New” button at the top of the page to go to the Add Plugins screen.
Step 5: Upload the Plugin ZIP File
On the Add Plugins screen, click the “Upload Plugin” button near the top of the page, revealing an option to upload a plugin ZIP file.
Step 6: Choose the Plugin ZIP File
Click the “Choose File” button and select the WooCommerce plugin ZIP file you downloaded in Step 1. After selecting the file, click the “Install Now” button.
Step 7: Activate the Plugin
After WordPress uploads and installs the plugin, a success message will appear. Click the “Activate Plugin” link to activate the WooCommerce plugin on your site.
Step 8: Verify Installation
To confirm the plugin is installed and activated, return to the Plugins section of your WordPress dashboard. The newly installed plugin will be listed among your active plugins.
Congratulations! You’ve successfully installed the WooCommerce Custom Discount plugin by BeePlugin. You can now start using its features to enhance your eCommerce store and optimize its performance to suit your business needs.
Pro Tips on Managing Inventory
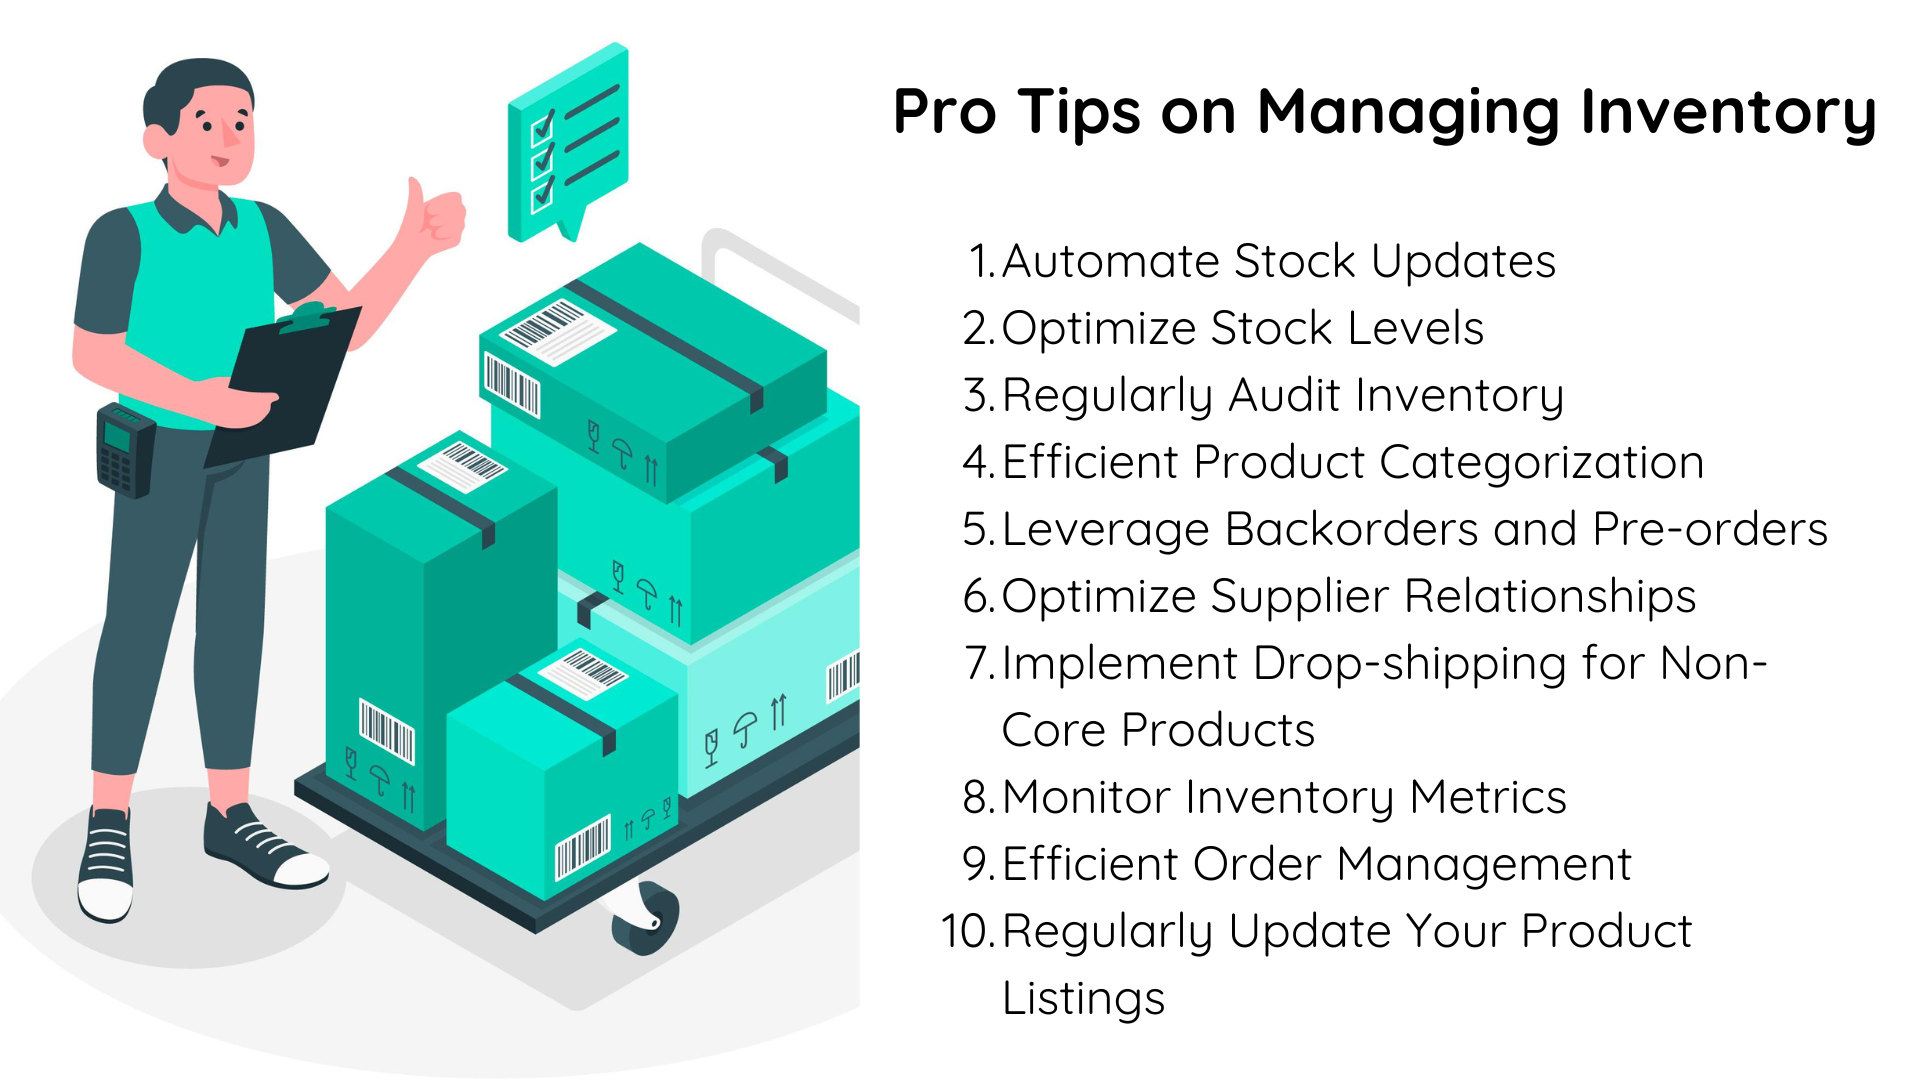
- Automate Stock Updates: Implementing automated stock updates ensures real-time accuracy and reduces the risk of human error in inventory management.
- Optimize Stock Levels: Optimizing stock levels helps maintain a balance between overstocking and stockouts, improving cash flow and storage efficiency.
- Regularly Audit Inventory: Regularly auditing inventory allows for the detection and correction of discrepancies, ensuring data accuracy and loss prevention.
- Efficient Product Categorization: Efficient product categorization enhances inventory organization, making it easier to track, locate, and manage stock.
- Leverage Backorders and Pre-orders: Leveraging backorders and pre-orders can improve customer satisfaction by allowing sales even when inventory is low or unavailable.
- Optimize Supplier Relationships: Optimizing supplier relationships ensures reliable supply chains and can lead to better pricing, terms, and delivery schedules.
- Implement Dropshipping for Non-Core Products: Implementing dropshipping for non-core products reduces storage costs and expands product offerings without increasing inventory investment.
- Monitor Inventory Metrics: Monitoring inventory metrics provides insights into sales trends, turnover rates, and stock health, enabling informed decision-making.
- Efficient Order Management: Efficient order management streamlines the process from purchase to delivery, minimizing errors and improving customer satisfaction.
- Regularly Update Your Product Listings: Regularly updating your product listings ensures accurate information, attracts customers, and reflects current inventory availability.
Conclusion
Effective inventory management in WooCommerce involves a combination of automation, regular audits, efficient categorization, leveraging backorders, optimizing supplier relationships, and using inventory management tools.
By implementing these pro tips, you can streamline your inventory processes, maintain optimal stock levels, and enhance the overall efficiency of your WooCommerce store.
If you want to develop customized WooCommerce plugin BeePlugin is the write plugin development agency for you. We develop robust and highly-secure plugins that integrate seamlessly and add features you need on your store in a few clicks.


 Article
 Infographic
 Plugin Development
 WordPress Development
 WooCommerce Development


